Peanut butter lovers, these Healthy Peanut Butter Bars were made for you! I make a batch almost every week because they come together with just FOUR ingredients, zero oven time, and taste dangerously close to a Reese’s cup (except you actually feel good about eating them)!

A Quick Look: No Bake Peanut Butter Bars
- ✅ Recipe Name: Healthy No Bake Chocolate Peanut Butter Bars
- 🕒 Ready In: 10 minutes prep + 1 hour freeze
- 👪 Serves: 12 bars
- 🍽 Calories: 316 per bar
- 📋 Protein: 8g per bar
- 🥬 Main Ingredients: Peanut butter, oat flour, maple syrup, chocolate chips
- 📖 Dietary Info: Vegan, gluten-free, dairy-free
- 🥣 Best For: Dessert, snacks, meal prep, lunchboxes
- ⭐ Why You’ll Love It: Four ingredients, no baking, and they taste like a homemade Reese’s!
Healthy No Bake Peanut Butter Bars Recipe
If you know me, you know I will always say yes to peanut butter and chocolate. It’s one of my favorite combinations, and these no bake bars keep it simple!
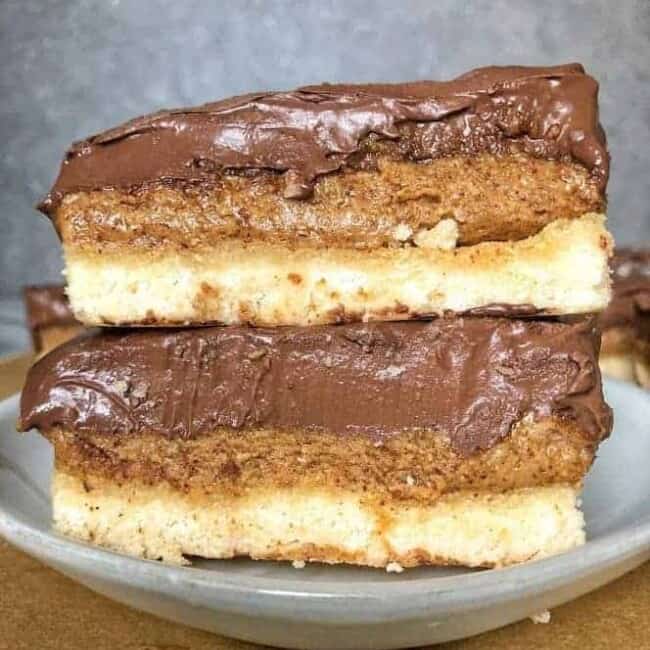
The base is made with peanut butter, oat flour, and maple syrup, so it comes together quickly and firms up nicely once chilled. Then you add a smooth chocolate layer on top, which gives each bite that sweet-salty balance that makes these so good.
I also love that these no bake peanut butter chocolate bars are easy to keep in the fridge or freezer. They’re great for meal prep, easy to portion out, and nice to have on hand when you want a homemade treat that is ready to go!
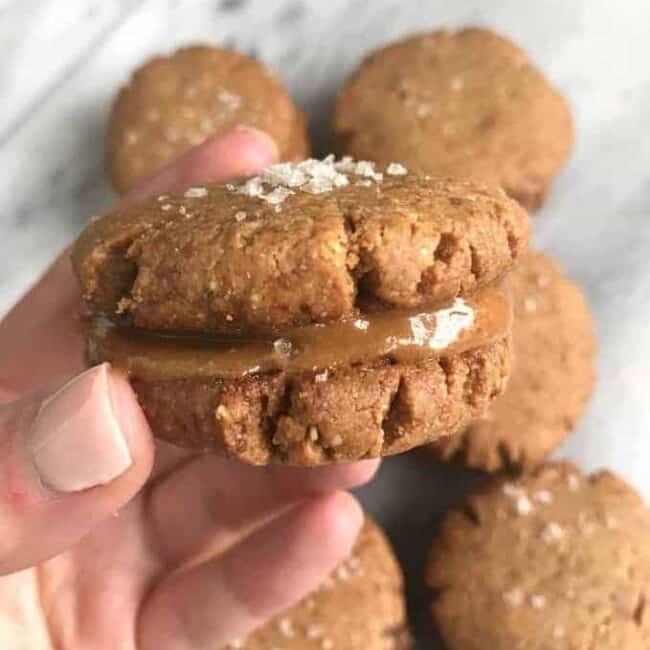
If you love easy no-bake treats like these, you’ll also want to try my Peanut Butter Energy Bars and No Bake Peanut Butter Oatmeal Cookies for more of that PB-chocolate goodness!
Table of contents
Why You’ll Love These Healthy No Bake Peanut Butter Bars
- Just four ingredients. Peanut butter, oat flour, maple syrup, and chocolate chips, that’s genuinely all you need! It doesn’t get much better than that.
- No oven required. These are fully no bake, which means you can make them any time of year without heating up your kitchen.
- They taste like a Reese’s cup. That salty peanut butter base + chocolate topping combo is absolutely unreal.
- Perfect for meal prep. Make a batch on Sunday and snack on them all week straight from the fridge or freezer.
- Easy to customize. Add flaky sea salt on top, swap in almond butter, or drizzle with white chocolate, these bars are a total blank canvas!

Ingredients Needed
Making a batch of these no-bake chocolate peanut butter bars are simple and requires only four ingredients.
- Peanut butter: You’ll need creamy peanut butter for the base and more for the topping if you’re mixing it with the melted chocolate. I like salted peanut butter for the sweet-salty flavor, but creamy unsalted works too!
- Oat flour: Oat flour gives the bars structure and a soft, sturdy texture. Store-bought is usually a little finer, but homemade works too if you blend rolled oats until very smooth. Using oat flour make these peanut butter bars completely gluten-free!
- Maple syrup: This sweetens the bars and help bring the base together. Honey or agave can work too.
- Chocolate chips: For the topping! Mini chocolate chips melt easily, but regular chocolate chips work just as well! You can use semi-sweet or dark chocolate chips.
Tip: For a yummy twist, you can add 1/2 cup of shredded coconut or chopped nuts as a topping. It can add an additional crunch and texture.
How to Make Easy Healthy Peanut Butter Bars
Step 1: Make the peanut butter base. In a medium bowl, mix together peanut butter, maple syrup, and oat flour until a thick dough forms. Press the mixture firmly and evenly into a parchment-lined 8×8 baking dish.
Step 2: Make the chocolate topping. Add chocolate chips and peanut butter to a microwave-safe bowl. Microwave in 30-second increments, stirring between each, until completely smooth.
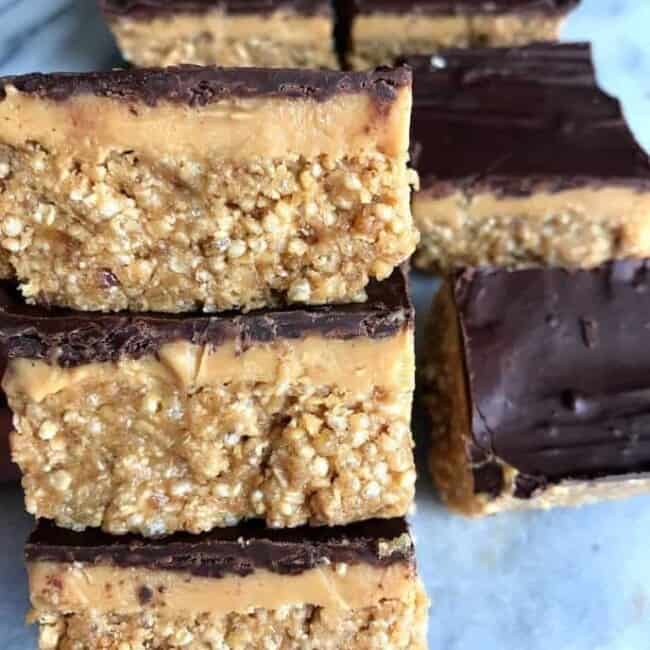
Step 3: Assemble and freeze. Pour the melted chocolate mixture over the peanut butter base and spread evenly. Transfer to the freezer for 1 hour, or until fully set and firm enough to slice cleanly.
Step 4: Slice and serve. Lift the bars out using the parchment paper, cut into 12 bars, and enjoy! Store in the fridge or freezer

Erin’s Expert Recipe Tips
- Use salted peanut butter. It’s the secret to that addictive sweet & salty balance. If you only have unsalted, add a pinch of salt to the base.
- Line your dish with parchment paper. It makes cleanup easy and helps you pull out perfectly clean bars for slicing!
- Don’t rush the freeze. A full hour in the freezer is key so the chocolate sets properly and the bars hold their shape when sliced.
- Use a warm knife for cleaner slices. Run your knife under hot water, dry it, and then slice. The chocolate won’t crack or shatter.
- Storing: Keep bars in an airtight container in the fridge for up to 1 week, or freeze for up to 3 months. To freeze without sticking, lay bars in a single layer first, then transfer to a freezer-safe bag or container.
Frequently Asked Questions
Below are some common no bake peanut butter bar recipe questions. Don’t see the answer you’re looking for? Leave a comment at the bottom of this post!
Usually, that means the mixture is a little too dry, or the peanut butter was too thick. Make sure everything is fully mixed, and the base is soft enough to press firmly into the pan. Using a creamier peanut butter helps a lot.
For these no-bake peanut butter bars, I recommend using a creamy, salted peanut butter. It can be natural, but it might make the base mixture more dry. If you find the base mixture is too dry, you’ll want to add just a dash of water to make it smoother.
Yes. Double the ingredients and use a 9×13 pan if you want a bigger batch for sharing or meal prep.
If you liked this recipe, you’ll want to try these!
Here are some of my favorite peanut butter recipes you should make next. Enjoy!
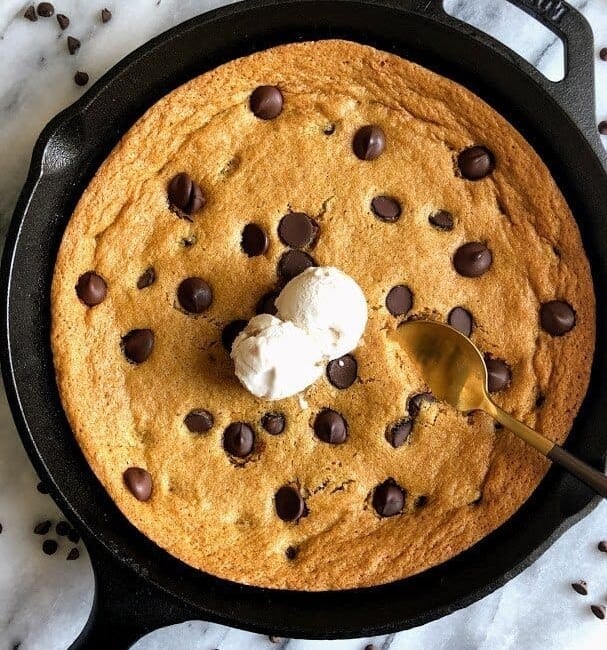
- Chocolate Baked Oats With Peanut Butter
- Salted Peanut Butter Banana Bread
- Gluten-Free Peanut Butter Cookie Cups
- Flourless Peanut Butter Blondies
- Peanut Butter Cornflake Bars
Video Tutorial
If you tried this recipe or any other recipes on my blog, please leave a 🌟 star rating and let me know how it went in the 📝 comments below. Follow @erinliveswhole on Instagram and tag me in any of the recipes you make so I can repost them!

Healthy Peanut Butter Bars Recipe
Ingredients
Method
- In a medium bowl, mix together peanut butter, maple syrup, and oat flour until well combined.
- Press mixture into an 8×8 dish.
- Pour chocolate chips and remaining peanut butter into a microwave safe dish and microwave on 30 second increments until chips are melted.
- Pour melted chocolate peanut butter mixture over peanut butter base.
- Place in freezer for one hour, then cut and serve.
- Store in fridge or freezer!
Nutrition
Video
Notes
- Use salted peanut butter for the best flavor. The sweet-salty balance is what makes these bars so good! If you only have unsalted, just add a pinch of salt to the base mixture.
- Line your dish with parchment paper. It makes cleanup a breeze AND helps you get cleaner slices later. Totally worth the extra 30 seconds!
- Don’t skip the freezer step. The bars need to go in the freezer for a full hour before slicing. This ensures the chocolate layer sets properly so everything cuts cleanly and holds together.
Ilsa Billings says
I made the no bake chocolate peanut butter bars. I brought them to work for a co-worker ‘s Birthday. They were a hit! Everyone could eat them! Delicious!!!
Erin says
Hi Ilsa, so happy everyone loved them!!
Amy Tolliver says
Hey!! These look amazing! I didn’t have oat flour so I used chickpea flour instead (which is also a lower glycemic option too!) and am excited to try them.
Amy says
Also forgot to add the stars!
Erin says
Hi Amy, sounds good. Let me know how they came out with that sub!
Maggie says
These are so delicious and addicting. Also a very filling and satisfying dessert!
Erin says
Hi Maggie, so glad you loved the bars! 🙂
Kim says
Fantastic!! Like a Reese’s you can feel good about eating 🙂
Erin says
Hi Kim, so glad you loved them!!
Anna P. says
Absolutely love these! They’re a family favorite! I can literally make any one of your recipes and I know it will be good. Keep being awesome and creating bomb recipes 😊
Anna p says
Forgot to add stars on my fist comment! Lol oops!
Erin says
Yay thank you! 🙂
Erin says
Hi Anna, so happy your whole family loves the bars! Thank you for your kind words and support!!
Maggie says
Wish I could give these 10 stars!!!
Erin says
Hi Maggie, so happy you loved the bars!!
Amber Pitts says
These don’t stay in my house more than a day!! Everyone is obsessed with these!
Erin says
Hi Amber, so glad you enjoyed them so much!!
Bree says
These are my all time favorite ELW recipe!! What a delicious dessert. I could eat these every day for the rest of my life. So darn easy to make too, which makes them even better. Thanks for this outstanding recipe!
Erin says
Hi Bree, so happy you love the bars so much! 🙂
Sarah says
Tasty and easy! I tested these for a company virtual happy hour using almond flour and peanut butter and they were amazing. During the happy hour I tried them with cashew butter, which while good wasn’t the same as peanut butter (which is why you Erin are the food blogger not me!) stick to Erin’s recipe and they are delicious! So rich I could only eat 1/2 a bar a time but worth it for that classic chocolate and PB mix.
Erin says
Hi Sarah, so glad you loved the bars and made them your own!!
leigh says
Everyone I’ve made these for loves them! So easy and better than Resse’s!
Erin says
Hi Leigh, so happy they’re a favorite!!
kate says
loved these!
Erin says
Hi Kate, so glad you enjoyed them!
Amy says
We substituted out the flour for gluten free graham crackers. They are a hit!
Erin says
Hi Amy, so happy you liked it and made it your own!
Shere says
These are sooo good though my husband suggested trying these with graham crackers. How much did you use?
susan says
I have made these twice and they are delicious and so easy! I made them with the almond flour and love how that adds more protein. My family cannot believe these are good for you. They taste so yummy! 🙂
Erin says
Hi Susan, so happy you like the bars and make them your own!!
Catherine says
These are so darn delicious! I topped with coconut flakes and coconut cashews just for fun and had to force myself to put them away so I can save some for the rest of the fam! Only took about 10 minutes to make too :).
Erin says
Hi Catherine, I am so glad you enjoyed it and hope you make more soon!
Lauren Badalucco says
Just made these on a whim the other night. They are amazing! I used the almond flour substitute and they are *chefs kiss* perfect. I keep mine in the fridge and they are a tad bit soft but hold their shape nicely. Didn’t use peanut butter in the chocolate on top – I used a couple tbsps of coconut oil instead because I used the last of my PB to make the bars but still delicious! Use a knife that has been run under hot water to cut them after they’ve set for nice cuts!
Erin says
Hi Lauren, I am so glad you liked them and made them your own! 🙂
Janie says
So easy and yummy for a little after dinner treat! Thank you for continuing to create delicious, healthy recipes!
Erin says
Hi Janie, so glad you enjoyed them!!
Janelle Molitor says
These are awesome!! So fast and easy and delicious
Erin says
Hi Janelle, so glad you liked them!
Sarah Templeton says
Loved these bars!!! Easy to make and delicious!
Erin says
Hi Sarah, I am so glad you liked them!
Nicole says
Loved it! The type of dessert we have to put in the freezer or we would eat the whole thing in a day. It’s not as sweet as a Reese’s PB cup but in a good way.
Erin says
Hi Nicole, I am so glad you enjoyed it! 🙂
Kelsey says
Love these! Such a quick and easy treat to make! Great to stick in the freezer and pull one out when you have a chocolate craving!
Erin says
Hi Kelsey, so glad you enjoyed them!!