
This is my go-to party dessert, and I've made it enough times to know exactly where people mess it up (I've made every one of those mistakes myself first). No cake mix, no box shortcuts, just almond flour, real eggs, and cream cheese doing the work that frosting usually does. If you're building out a healthy paleo yellow cake for a birthday spread or just want something that travels well without screaming "diet food," this is it. It's landed in the same rotation as my healthy gluten-free zucchini cake as one of my most-requested make-agains.

Jump to:
Why Make These Instead Of A Boxed Cake Pop Kit?
Store-bought cake pop mixes lean on cake mix, canned frosting, and candy melts loaded with hydrogenated oils. This version swaps that for almond flour and coconut oil, so you're getting actual protein and fat instead of just sugar and stabilizers. The texture is denser and less crumbly than a boxed version too! That matters way more than people expect. It's the reason these hold their shape on the stick instead of sliding off!
Why You’ll Love This Recipe
- No cake mix, no shortcuts, still easy. Everything is made from real ingredients you can pronounce, but the steps are simple enough to knock out in one afternoon.
- They actually hold their shape. The almond flour and cream cheese combo is denser than a boxed mix, so you're not fighting balls that crumble apart or slide off the stick.
- Naturally gluten free. No flour swaps or substitution guesswork, this is just how the recipe is built from the ground up.
- Endlessly customizable. Change the mix-ins, the coating, or the flavor and you've got a completely different treat for every holiday or party theme.
- Kid-approved without the sugar crash. Real protein and fat instead of straight sugar means these hold up better for snack time, not just dessert time.

The Two Ingredients That Matter Most
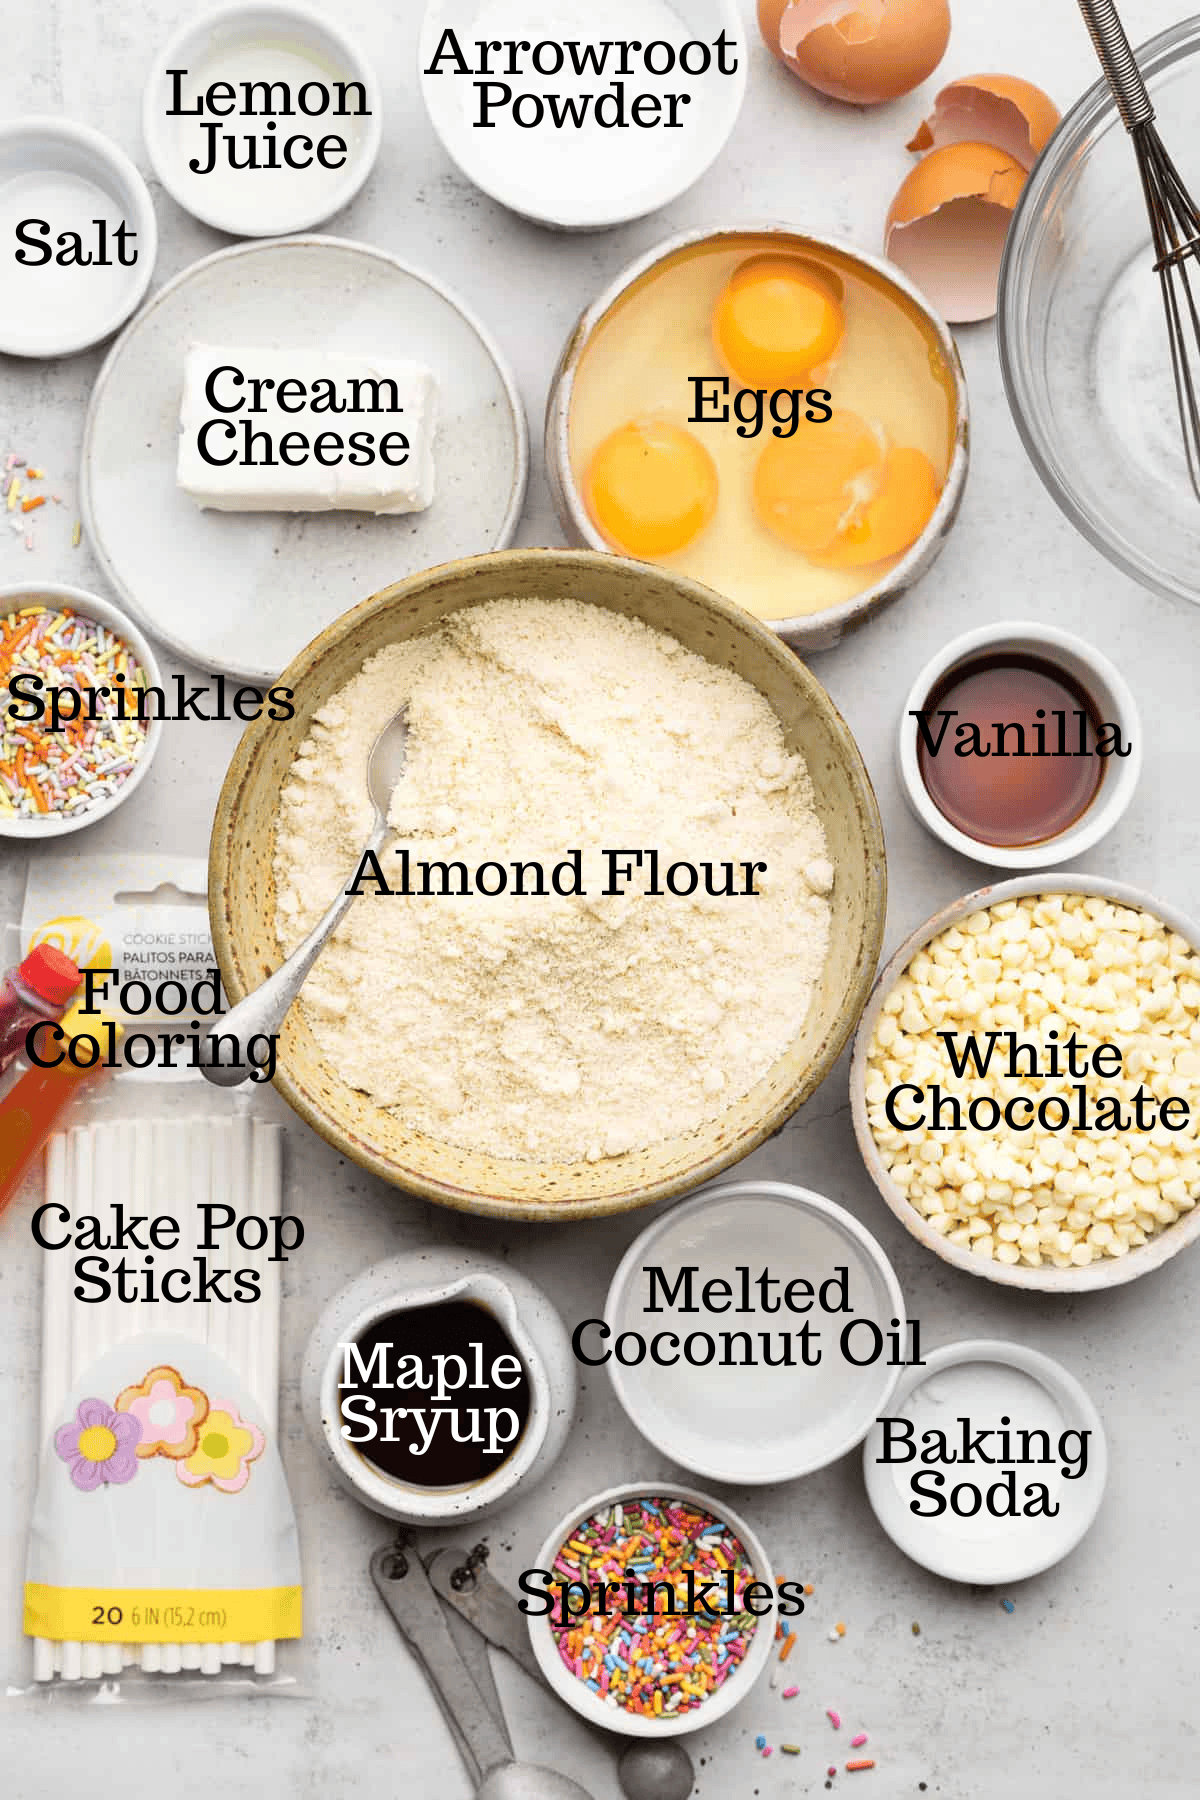
Everything else in this recipe is standard baking-aisle stuff. These two are worth pausing on:
- Almond flour, not almond meal. Almond meal is coarser and includes the skins. In this recipe it makes the crumb gritty instead of tender. If a bag just says "almond meal/flour," check the texture, it should look like fine sand, not cornmeal. This is the same flour that shows up across most of my almond flour dessert recipes, so it's worth keeping a bag on hand.
- Full-fat cream cheese. This is the binder that turns crumbled cake into moldable dough. Low-fat versions have more water in them, which makes the mixture too wet and the finished balls prone to sliding off the stick. Add it gradually rather than all at once, you want the mixture to just barely hold together when you press it, not feel sticky. It works the same way in my healthy cream cheese frosting recipe, if you want to see the ratio in action elsewhere.
Tips on how to make healthy cake pops
Add cream cheese in stages. Mix the warm crumbs with cream cheese by hand, starting with about two-thirds of what the recipe calls for. Only add more if the mixture won't hold together when pressed. This is the single biggest variable in whether your pops hold their shape.
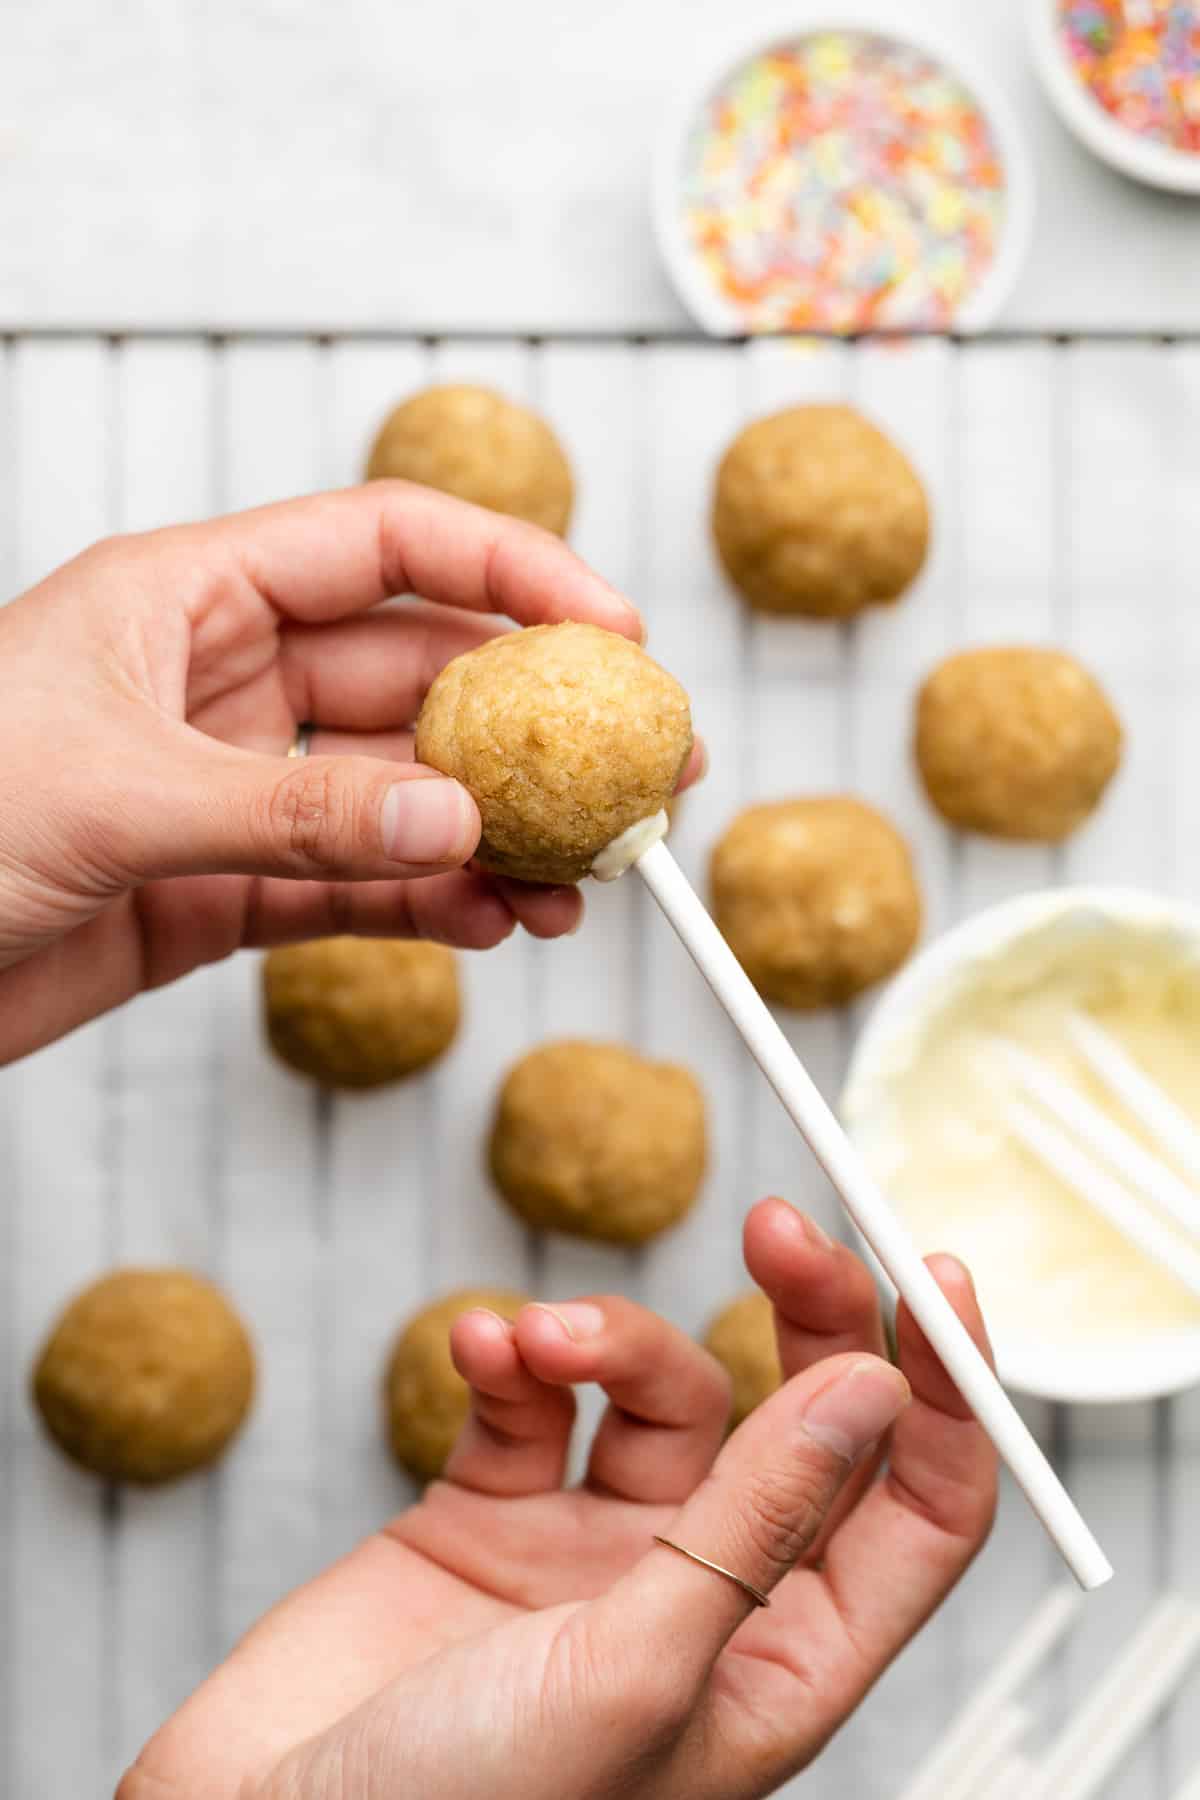
Dip the stick before you dip the pop. Roll the mixture into balls, then dip just the tip of each cake pop stick into melted white chocolate before inserting it into a ball. That small amount of chocolate acts as glue between the stick and the cake. Skip this step and you'll lose pops off their sticks the second you try to coat them. Freeze for 20 minutes before the full coating step.
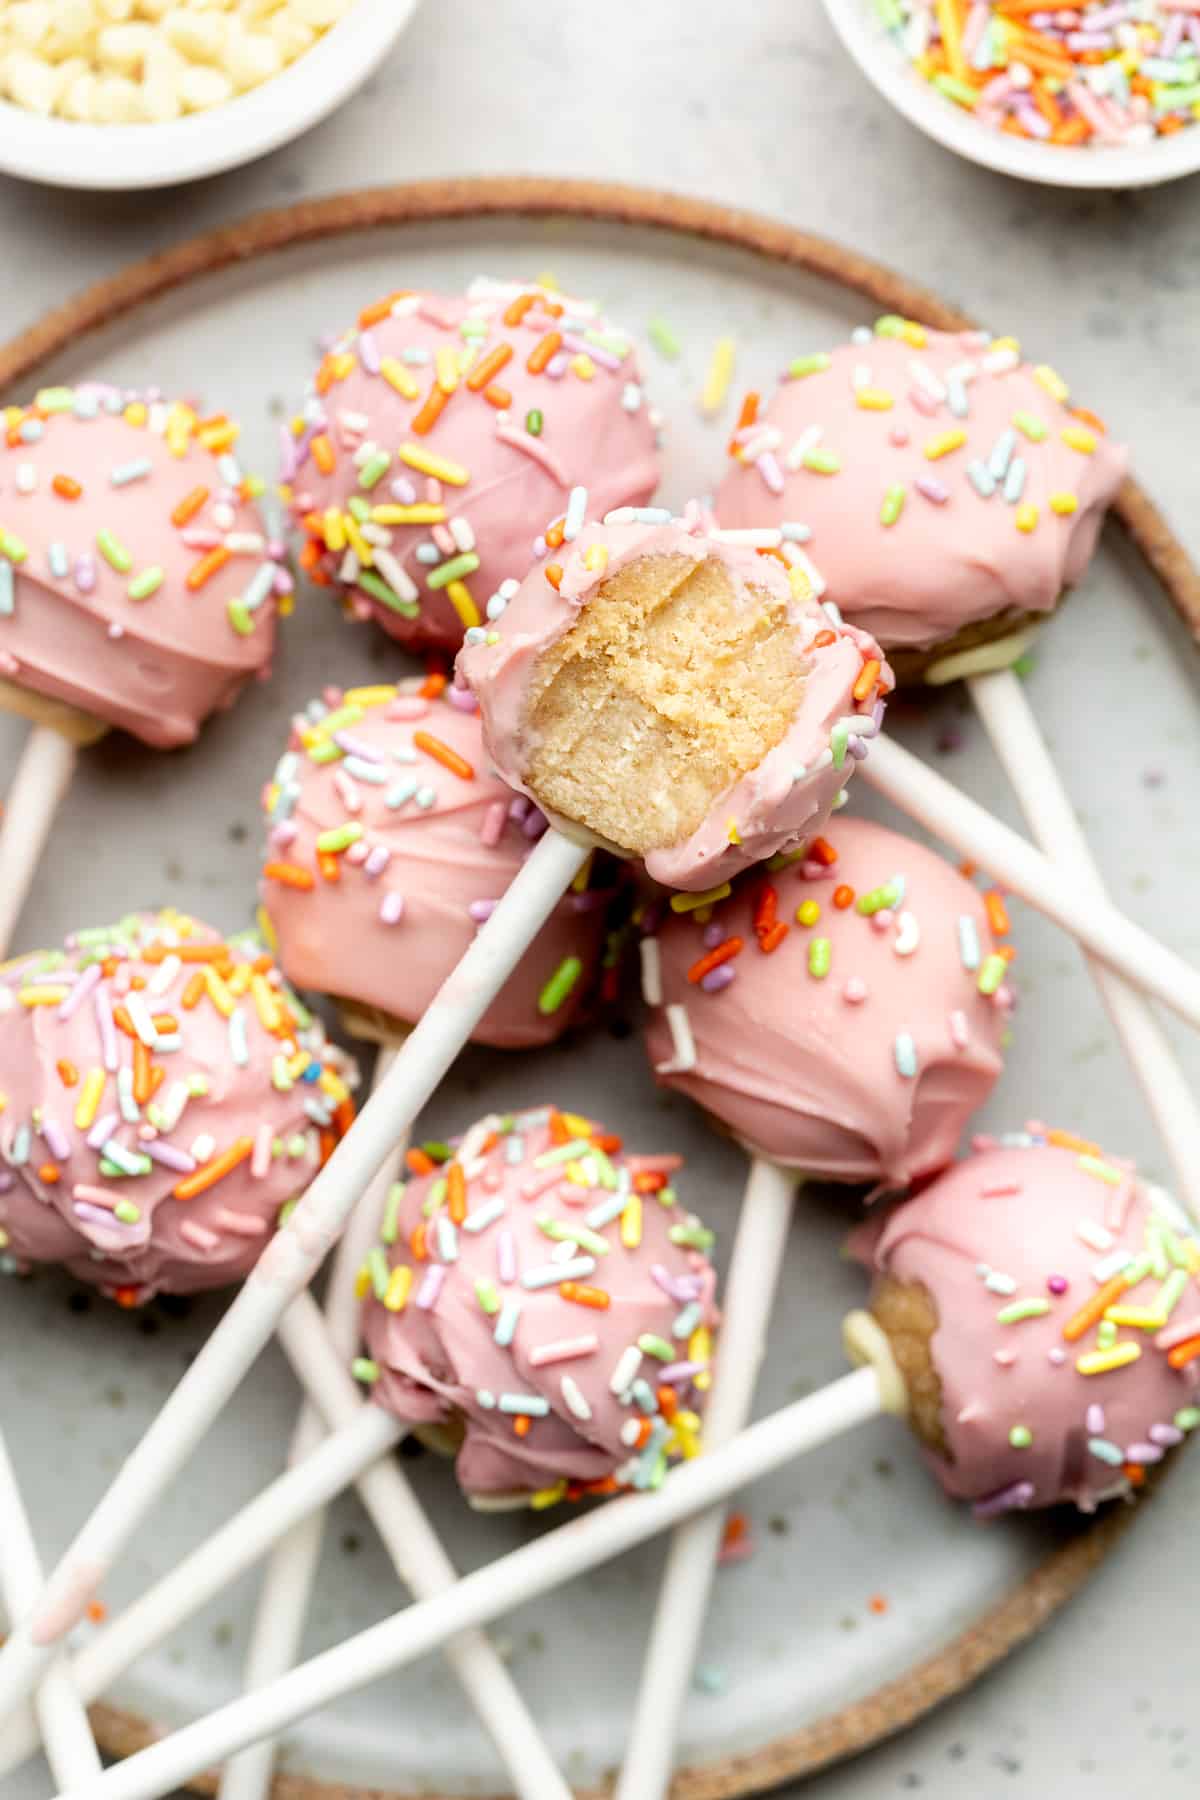
Coat, sprinkle immediately, then stand upright. Melt more chocolate, add food coloring if you're using it, and dip each frozen ball to fully coat. Add sprinkles right away, while the coating is still wet, or they won't stick. Then stand the pops upright in a tall glass or a block of styrofoam while the coating sets. Laying them on a rack leaves a flat spot where they touch down. The same melt-and-dip method is what I use for the coating on my no-bake pumpkin bites, if you want more practice with it before party day.
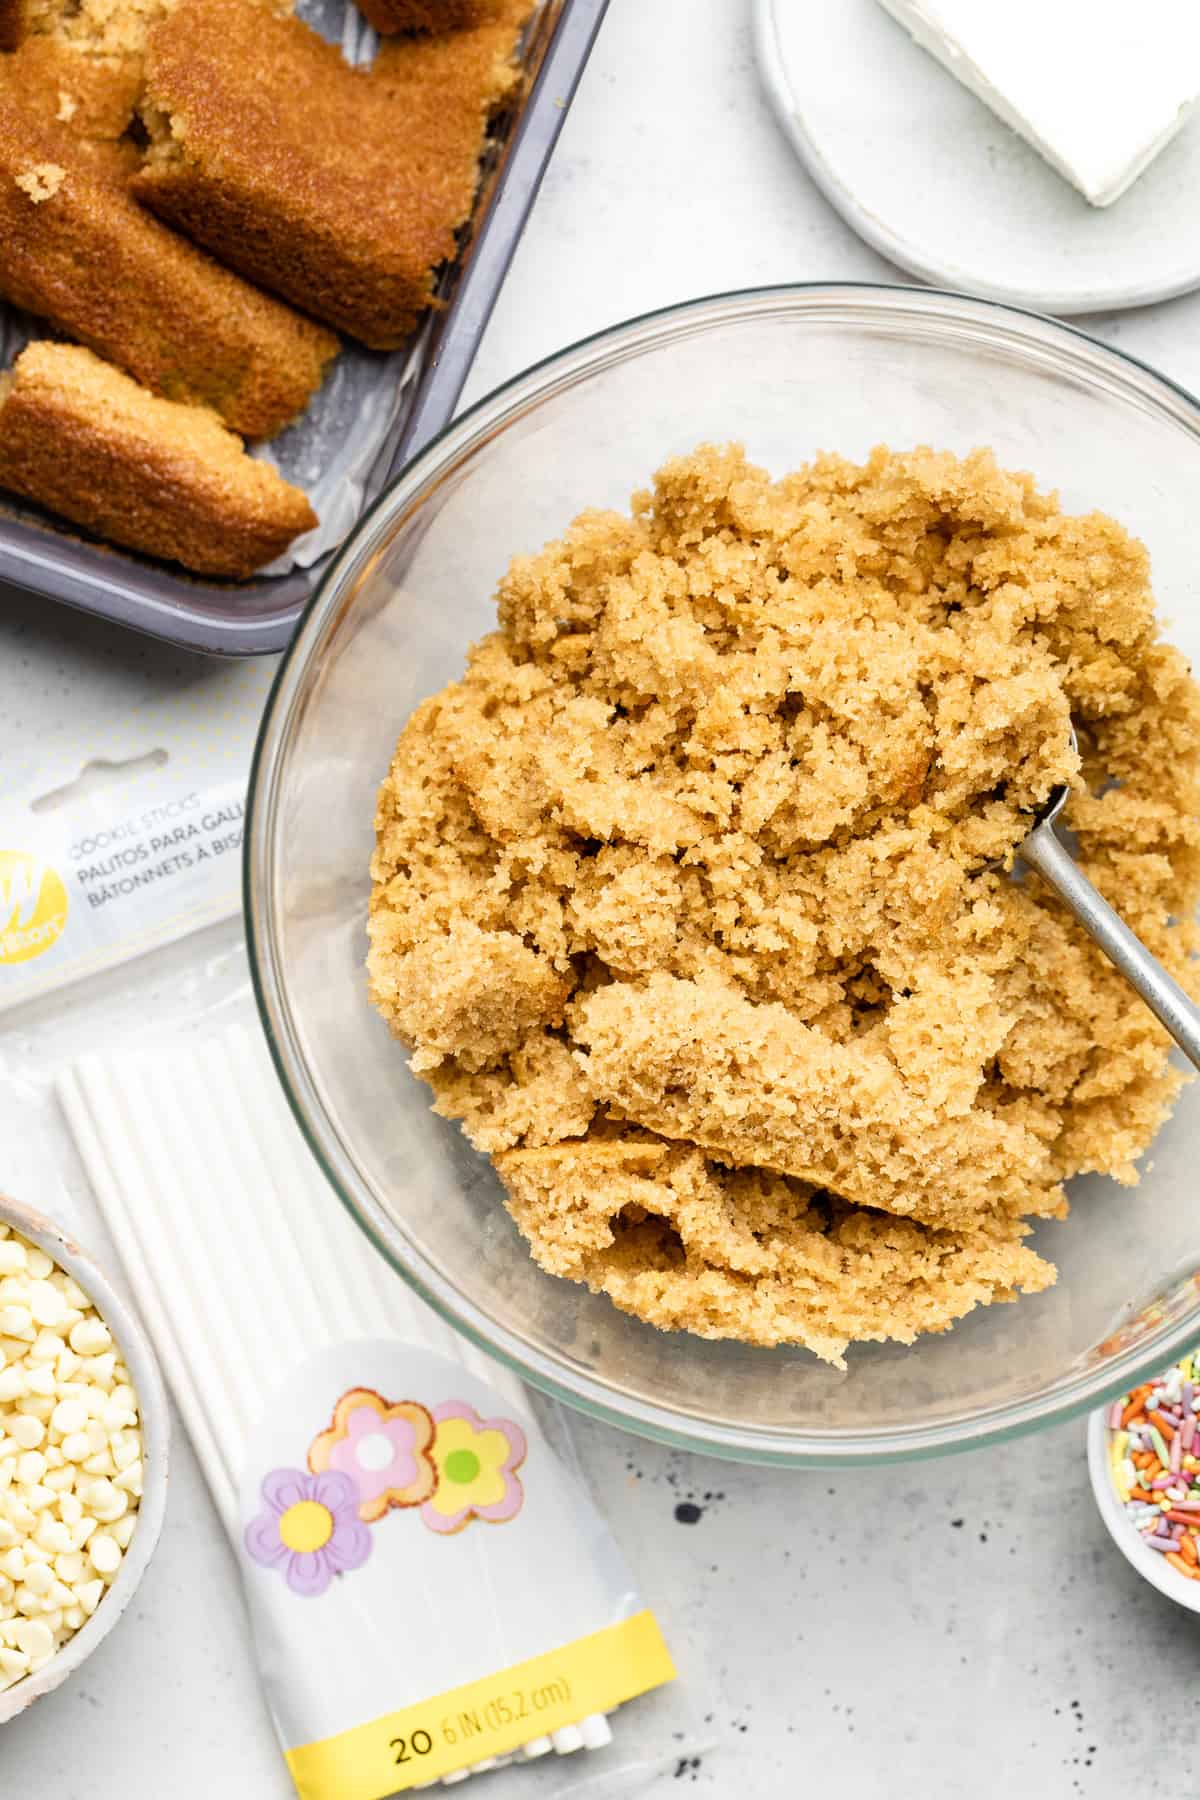
- Bake it slightly under, not through. Combine the dry ingredients in one bowl and the wet in another, mix them together, then pour into a greased 8x8 pan and bake at 350F for 22 to 24 minutes, until the top is lightly golden but not browned. Don't chase a fully-set center like you would for a layer cake. You're about to scoop out the interior anyway, and a slightly underbaked middle is what keeps the crumb moist enough to roll into balls later. If you bake it until a toothpick comes out clean, the balls will be dry.
- Only use the soft interior. Let the cake cool for about 5 minutes, then scoop out the soft crumb from the middle and leave the firmer, browned edges behind (save those for snacking, they're basically a chef's treat). The soft interior crumb is what gives you a smooth, moldable dough. The edges won't break down the same way.

Erin's Expert Tips
Chocolate turning thick and grainy instead of smooth? That's called seizing, and it happens when even a drop of water gets into the bowl (steam from the microwave counts). Stir in a small spoonful of coconut oil to loosen it back up.
Coating cracking after you dip? Your cake balls are too cold. Straight-from-the-freezer cake meeting warm melted chocolate causes a temperature shock that cracks the shell as it sets. Let the balls sit out for a minute or two before dipping.
Pops sliding off the stick mid-dip? That's almost always a skipped or rushed stick-dipping step, or not enough freezer time before coating. Give them the full 20 minutes.
Work in small batches. Keep the un-dipped balls in the fridge while you coat a few at a time. If they sit out too long, they soften and get harder to dip cleanly.
Common Recipe Questions
Below are some common questions about these cake pops. Don’t see the answer you’re looking for? Leave a comment at the bottom of this post!
Yes, dark chocolate works well and cuts down on sweetness. Melt it the same way, in 30-second microwave increments, stirring between rounds.
Plain Greek yogurt, ricotta, cottage cheese, or a dairy-free cream cheese can work as substitutes, though I haven't personally tested every option, so texture may vary. If you're avoiding dairy altogether, my paleo tahini banana bread uses a similar from-scratch, dairy-free approach worth borrowing from.
Swap in a sugar-free maple syrup substitute and sugar-free white chocolate. Everything else in the recipe is already low-carb. I use the exact same keto swap in my keto peanut butter cookie recipe if you want another low-carb treat on hand.
Love this question because why should sticks stop you!? Skip them and you've got cake balls instead!! They're so good and poppable! Just eat them with your fingers.
Storing leftovers
Store finished cake pops in the fridge in a container with a lid, where they'll stay fresh for up to 2 weeks. To get ahead of a party, the un-dipped cake balls can be made a day or two in advance and kept covered in the fridge until you're ready to add sticks and chocolate. I haven't tested freezing this specific recipe, so if you try it, start with a small batch.
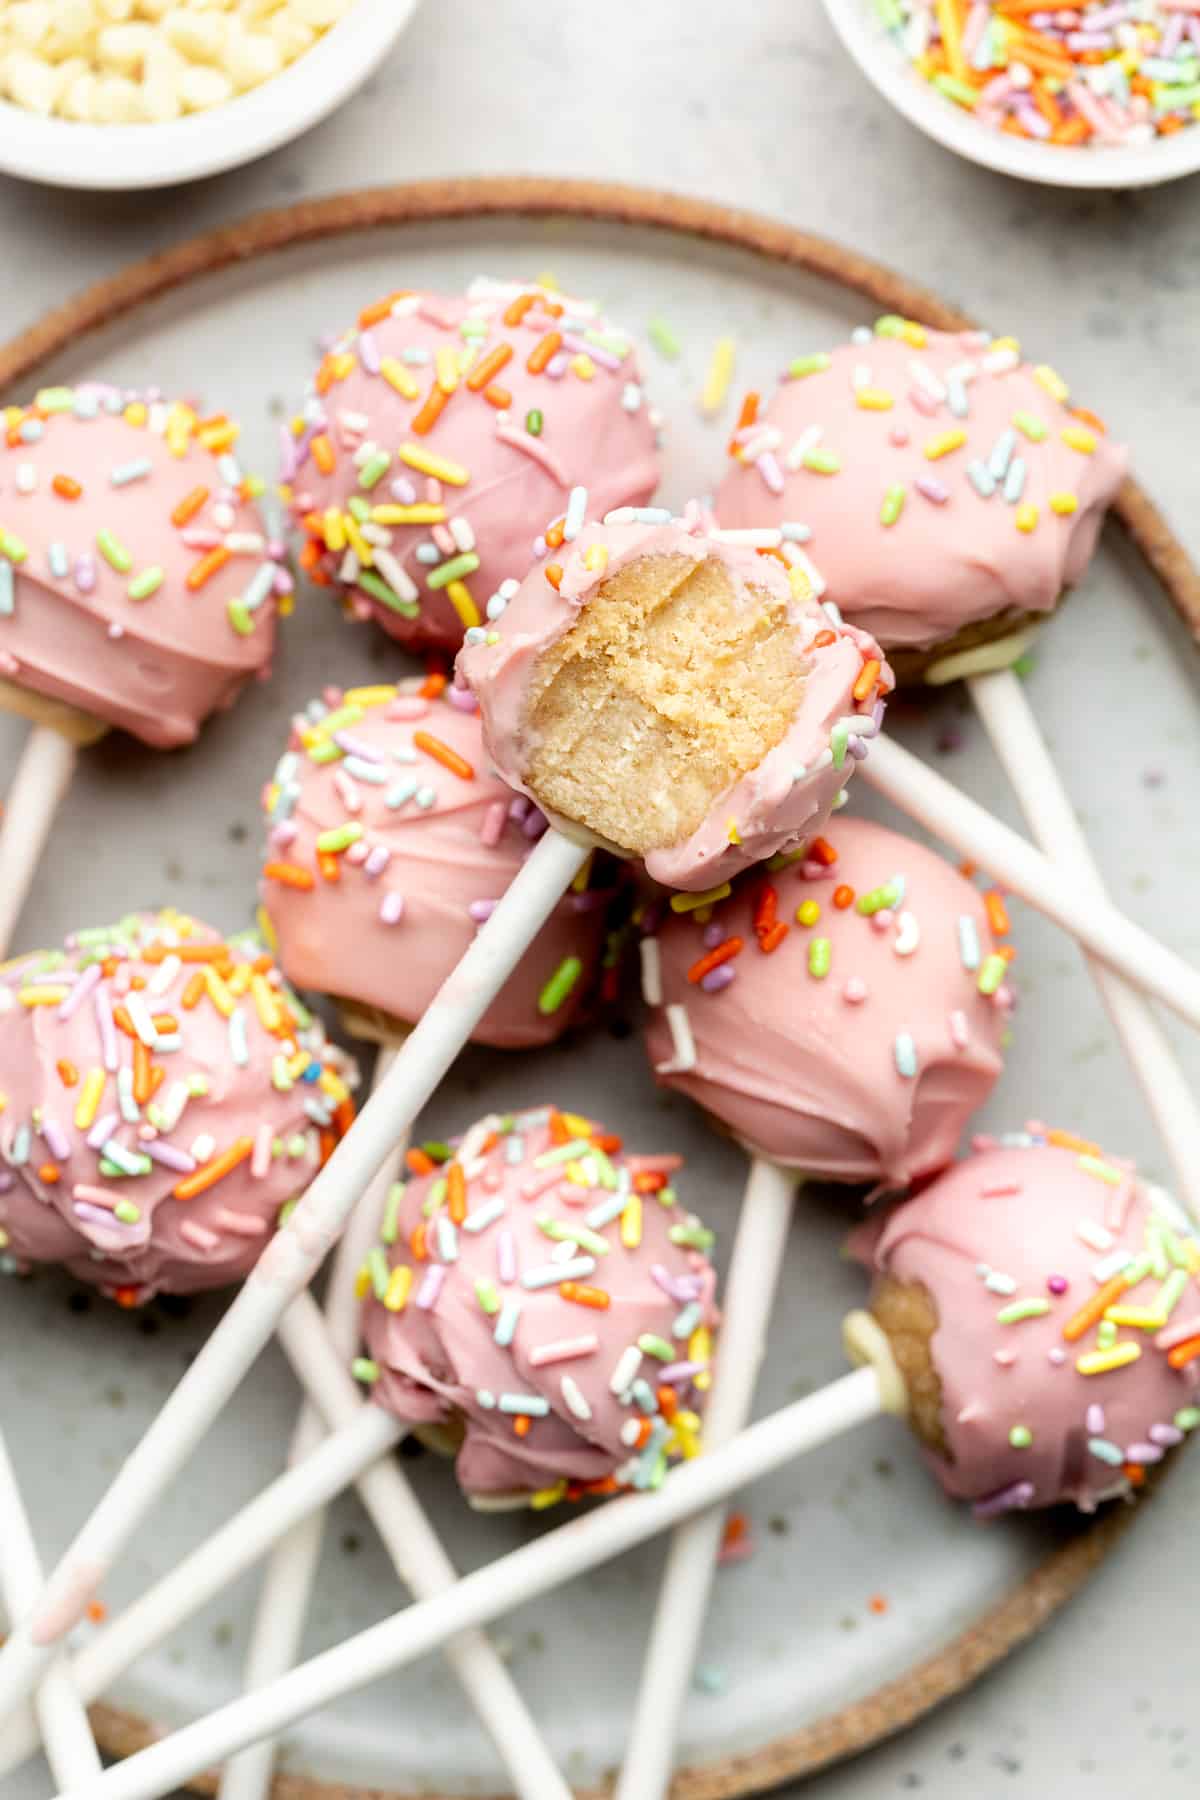
Healthy Cake Pops (Gluten Free)
Ingredients
Method
- Preheat oven to 350F and line 8x8 with nonstick spray.
- In a large bowl, combine your almond flour, arrowroot, baking soda, and salt.
- In a smaller bowl, whisk eggs, melted coconut oil, maple syrup, vanilla, and lemon juice.
- Add wet ingredients to dry and stir until combined. Pour into 8x8 pan.
- Bake uncovered for 22-24 minutes or until lightly golden, but not brown.
- Let cool for 5 minutes, then scoop out the soft insides (and top is okay) of the cake, leaving the hard brown outsides. You want the actual cake part. Leave the edges and save them for snacking.
- Pour them into a bowl and add the cream cheese. Use your hands to mix, it will be hot but the cream cheese should chill it enough to handle.
- Roll into balls and place on parchment lined baking rack.
- Melt your chocolate by microwaving in increments for 30 seconds until completely smooth.
- Dip the end of the cake pop stick into white chocolate and then into the ball. This helps hold the stick in place. Place in freezer to chill for 20 minutes.
- Melt chocolate and add food coloring to your preference. Take balls out of freezer and coat completely in chocolate. Dip in sprinkles if desired.
- Place on cookie cooling rack over top of baking sheet to prevent puddles of chocolate at the bottom.
- Refrigerate at least 10 minutes before eating.
Nutrition
Video
Notes
- Use Almond Flour, Not Almond Meal: This one really matters. Almond meal will make your cake pops taste gritty and dense, so be sure you're reaching for almond flour for that smooth, tender crumb.
- Scoop Only the Soft Interior: After baking, scoop out only the soft, moist inside of the cake (the top is fine to include too) and leave the firmer browned edges behind. Those edge pieces are great for snacking, and using the softer crumbs is what gives you the best cake pop texture.
- Chill Before Dipping in Chocolate: After putting the sticks in the cake balls, pop them in the freezer for 20 minutes before coating in chocolate. This firms everything up so the chocolate goes on smoothly and the pops hold their shape.
Tried this recipe?
Let us know how it was!if you liked this recipe, you'll want to try these…
Recipe by Erin Morrissey and Photos by The Mindful Hapa




Christina says
Hey, the last step says to refrigerate 10 minutes before eating but I want to include them in my kid’s lunchboxes for school. Would an ice pack be enough to keep the chocolate from melting? Can I use mascarpone instead of cream cheese? Thank you!
Erin says
Hi Christina, definitely! It shouldn't melt - and you can use mascarpone! Let me know how yours come out!
Danielle says
My toddler has begun asking for a "pink treat" everytime we are out. I wanted to find an alternative to buying her cake pops that would be less expensive and a bit healthier. These were a huge hit!! Recipe was easy enough that she enjoyed helping me make them and they came out delicious. I love that they are almond flour based so she is getting a nutritious base despite the chocolate on the outside. Thank you!
Erin says
Hi Danielle, so happy she loved them so much!! 🙂
B says
Thank you! I was looking for a good cake recipe for pucks. I skipped the cream cheese. I covered the cake after 10 minutes or so until conpletely cool and stay super moist, and then threw it into my kitchen aid once completely cool. Didn't need any extra liquid. This is how I make my regular cake pops too. No extra icing. Too sweet. And as long as its not overbaked its soft enough. Then covered them in white chocolate. Do you think they'll last a few days on the counter since no cream cheese? I froze most just in case
Erin says
Hi, so happy you loved it and made it your own. The best way to store leftover cake pops is in the refrigerator. That way, they won’t melt. Just place them in a container with a lid and they will stay fresh and edible for up to 2 weeks.
Tracy says
Hey E! After you let the cake bake and cool for 5 min (before adding cream cheese) is the middle supposed to be not fully cooked? I baked it for 24 min!
Thank you you’re the best!
Sam says
When the cake comes out it had a little ammonia smell- is that the lemon and baking soda reacting? The smell stopped after mixing cream cheese and all my products are new!
Casey Colodny says
these cake pops are not only absolutely adorable but they taste AMAZING as well! so moist and perfectly sweet, they give Starbucks a run for their money!
Erin says
Hi Casey, so glad you loved them! 🙂
Andi says
These are perfect!! Taste better than starbucks cake pops! I didn't have cake pop sticks either so I just made them without and they still came out great! Perfect, fun little treat!
Erin says
Hi Andi, so so happy you loved them and still good! They're cake balls!
Carrie says
Is there a sub for those who can’t have cream cheese?
Erin says
Hi Carrie, you could try to use plain Greek yogurt, ricotta, cottage cheese or tofu. I haven't tried them with these subs so let me know what you use and how it comes out!
Ruthie Bernstein says
These look amazing! I would love to make these with my niece — I 100% agree sprinkles make everything better!
Erin says
Hi Ruthie, so glad you both enjoyed them!! 🙂
Valerie says
Do you think it would be okay to use the Red Mill 1to 1 flour for people allergic to tree nuts?
Erin says
Hi Valerie, I haven't tried it with that sub but feel free to give it a try and let me know how they come out!!
Ashley says
Hi could i do dark chocolate covering?
Ashley says
Hi could i do dark chocolate instead of white?
Erin says
Hi Ashley, yes, of course! Let me know how they come out!!